 by
by 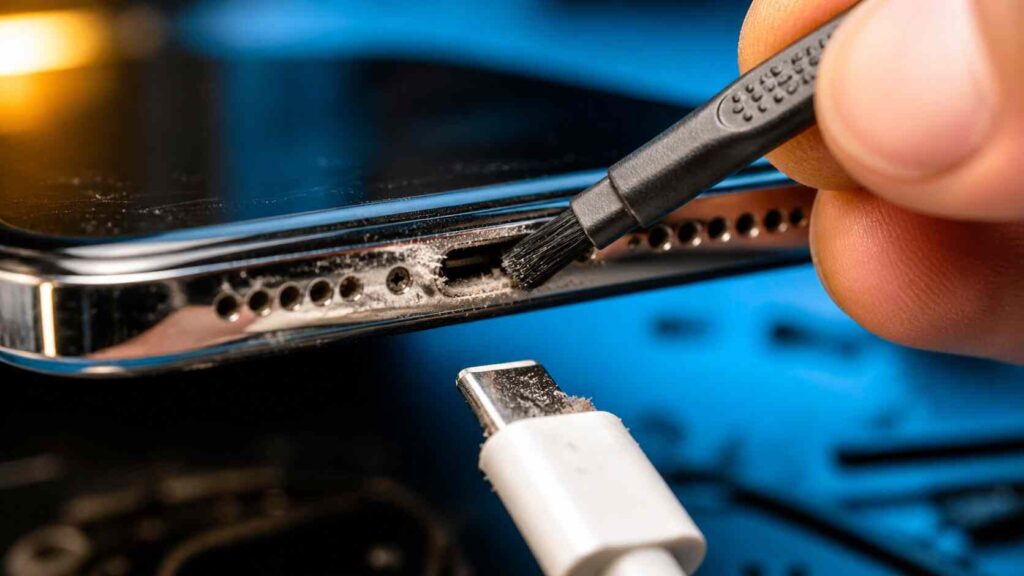
A charger port issue typically comes at the most inappropriate time. Your battery is drained, the cable is always plugged in, and your screen does not want to display the charging sign. A phone which will not charge is not necessarily one which has a dead port. Charging problems usually start with dust, pocket lint, moisture, an inadequate cable, or daily use. To check the problem safely and determine whether you can work on them yourself or you need a repair expert, the steps below would help you to do so.
- Common Signs of a Bad Charging Port
- Step 1: Test the Cable, Adapter, and Outlet
- Step 2: Restart the Phone
- Step 3: Inspect the Port with a Flashlight
- Step 4: Turn the Phone Off Before Cleaning
- Step 5: Remove Loose Dirt Gently
- Step 6: Clean with a Soft, Dry Brush
- Step 7: Deal with Moisture the Right Way
- Step 8: Try Wireless Charging
- Step 9: Know When Home Fixes Are Not Enough
- How to Prevent Charger Port Damage
- FAQs
Common Signs of a Bad Charging Port
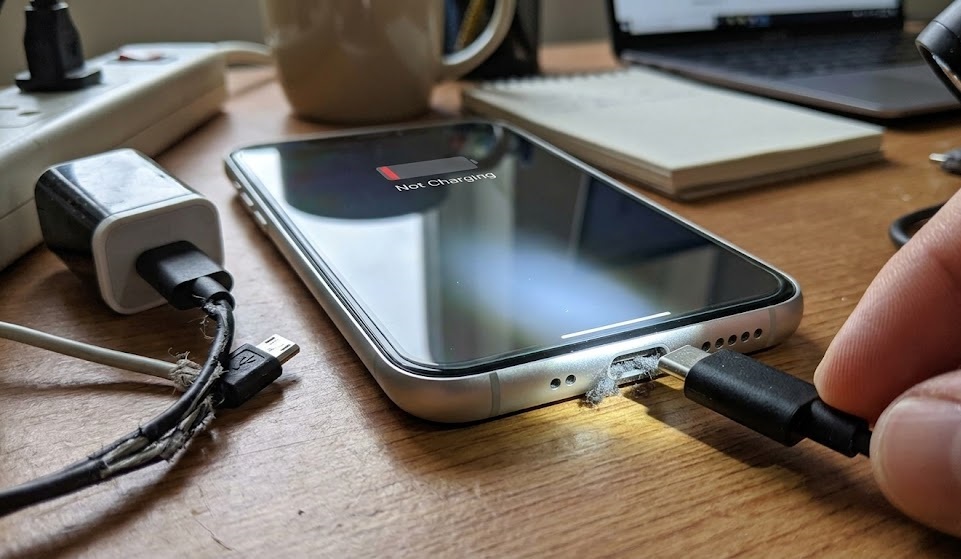
Clear warnings are created by a broken or dirty charging port. The cable can become loose and can easily fall out or can only work when bent to one side. Your phone might charge slowly, cease charging after several seconds or connect and disconnect. In some instances the charger will only fit half way due to the lint stuffed inside the hole. In the event of burning smells, heat around the port, corrosion or any visible damage, discontinue the use of the charger and seek the attention of a phone repair shop.
Step 1: Test the Cable, Adapter, and Outlet
Begin by the easiest check. Try another charging cable, wall adapter, and power socket. When the actual issue is a deteriorated cable, many individuals replace a charging port. Take a closer look at the tip of the cable. It may not connect properly in case it is bent, dirty, cracked, or loose. It should be a good quality charger designed to fit your type of phone. Damaged or cheap accessories may charge poorly, and may cause the port to wear out even faster.
Step 2: Restart the Phone
A restart is too easy, and it can eliminate minor software bugs. Switch the phone off, wait some seconds and switch it on again. After starting, plug in the charger. When the charging icon shows and remains consistent, the port might not be a problem. Assuming nothing will change, proceed with a thorough physical inspection.
Step 3: Inspect the Port with a Flashlight
Hold the phone in front of a bright light and peep in through the charging port. Do not yet poke anything in there. Look for dust, lint, scraps, moisture, damaged contacts or dark spots. Pocket lint can easily be squashed between the bottom of the port and the cable is unable to reach the contacts.
Step 4: Turn the Phone Off Before Cleaning
Before cleaning your phone, always shut down your phone. Disconnect the cable and remove the case in case it covers the port. Do not clean the port when the phone is being charged. Do not use needles, metal pins, knives, damp cotton, liquid cleaners, and harsh chemicals. They may scratch contacts or even push dirt deeper or cause electrical damage.
Step 5: Remove Loose Dirt Gently
Hold the charging port facing downwards and gently tap the phone against your palm. This is able to loosen dust without moving it further into the building. A small electrical airblower should also be used designed to clean out electronics. Also do not use your mouth to blow as breath is wet. Once this is done, repeat the test on the charger. In case the cable now sits in place, then it was probably the dirt that was the primary issue.
Step 6: Clean with a Soft, Dry Brush
In case there are still traces of debris, then a clean, dry, soft-bristled brush will do the trick. Lightly brush around the port opening, and inside the edge. Make your movements short and gentle. Never scrape the bottom of the port. Brush, then again examine with flashlight. When a port appears clean and dry, then only plug in the cable. This measure can frequently correct charging issues which are brought about by lint.
Step 7: Deal with Moisture the Right Way
When your phone was caught in rain, sweat or spilled fluid, do not force your phone to recharge. Disconnect the cable and leave the phone to dry in an open area with cool air. Do not use hair dryers, heaters, ovens, or direct sunlight since high temperatures can damage the battery and screen. Wait till the port is quite dry, and reattack.
Step 8: Try Wireless Charging
Provided your phone has the capability to charge wirelessly, then put your phone on a wireless charging pad. Assuming that it operates wirelessly but not with the cable, the battery is likely to be operating and the problem may lie within the port or cable connection. Wireless charging can ensure that the phone remains in usable condition as you make plans to clean or repair.
Step 9: Know When Home Fixes Are Not Enough
Internal parts, which have broken, cannot be fixed by cleaning. See a technician when the cable continues to wiggle after cleaning, the phone only charges in one pose, the port looks bent, or multiple working chargers malfunction. As well, get assistance following liquid harm or rust. A trained repairer will be able to open the phone, inspect the port and replace damaged components without causing any damage.
How to Prevent Charger Port Damage
Plug the charger directly in and out holding onto the plug and never pull on the wire. Always leave your phone in dusty pockets and wet surfaces. Charge with good quality charging accessories and do not force the cable when it does not fit.
FAQs
Is it possible to replace a damaged charger port myself?
Dirt or lint may be cleaned at home, but broken contacts are to be repaired by professionals.
Why can my phone only be charged at an angle?
The port can be messy, loose, worn-out or damaged inside.
Is it safe to use a toothpick?
Only soft plastic pick can help when applied carefully, but not sharp or metal instruments.
How much does port repair cost?
The price will rely on the model of the phone, the extent of damage, and the price of the repair shop.
Is it better to change my phone?
Usually no. Provided the phone is functional, the port repair is usually less expensive.